Turn signal lights
Replacing light bulbsTail lights
Replacing light bulbsStop lights
Replacing light bulbsSide turn signal lights
Replacing light bulbsSide marker lights
Replacing light bulbsReplacing
Light bulbsRear turn signal lights
Replacing light bulbsRear side marker lights
Replacing light bulbsParking lights
Replacing light bulbsOuter foot lights
Replacing light bulbsLights
Replacing light bulbsLight bulbs
ReplacingLicense plate lights
Replacing light bulbsHigh mounted stoplight
Replacing light bulbsHeadlights
Replacing light bulbsFront turn signal lights
Replacing light bulbsFront side marker lights
Replacing light bulbsFog lights
Replacing light bulbsDaytime running light system
Replacing light bulbsBack-up lights
Replacing light bulbsLight bulbsYou may replace the following bulbs by yourself. The difficulty level of replacement
varies depending on the bulb. As there is a danger that components may be damaged,
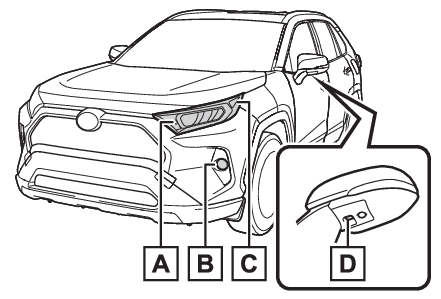
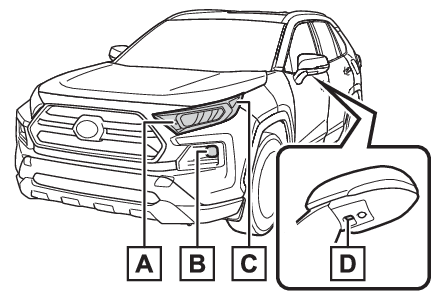
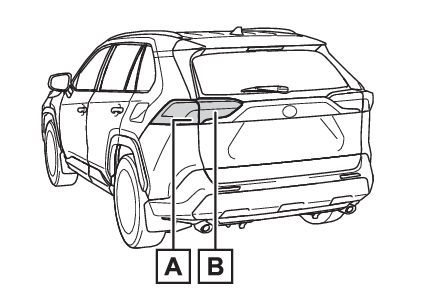
we recommend that replacement is carried out by your Toyota dealer.Preparing for light bulb replacementCheck the wattage of the light bulb to be replaced. (Light bulbs)Bulb locationFront (type A)Front turn signal/parking lightsFog lights (if equipped)Front side marker lightsOuter foot lights (if equipped)Front (type B)Front turn signal/parking lightsFog lightsFront side marker lightsOuter foot lightsRearRear turn signal lightsBack-up lightsLights that need to be replaced by your Toyota dealerHeadlightsDaytime running lightsSide turn signal lights (if equipped)Tail lightsStop lightsRear side marker lightsHigh mounted stoplightLicense plate lightsNote:LED lightsThe lights other than the following lights each consist of a number of LEDs. If any
of the LEDs burn out, take your vehicle to your Toyota dealer to have the light replaced.Front turn signal lightsFront parking lights (type A and B)Front side marker lights (type A and B)Fog lights (if equipped)Rear turn signal lightsBack-up lightsOuter foot lights (if equipped)Condensation build-up on the inside of the lensTemporary condensation build-up on the inside of the light lens does not indicate
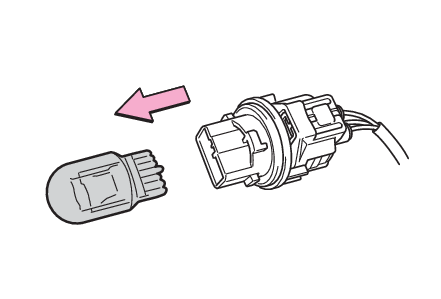
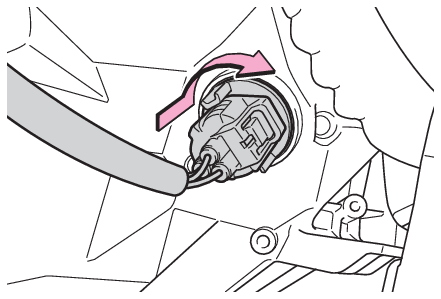
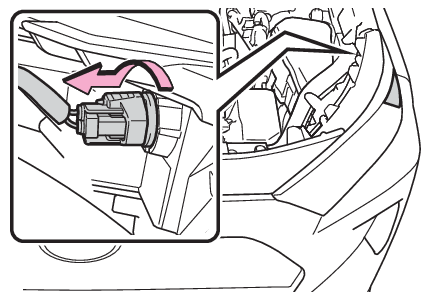
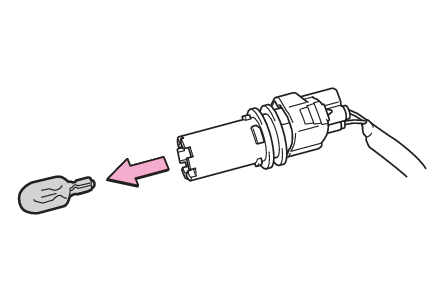
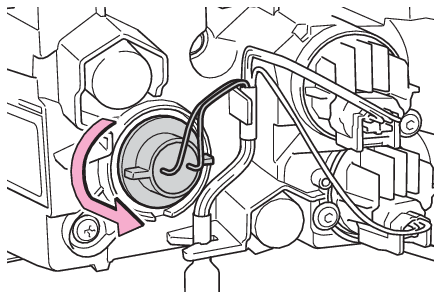
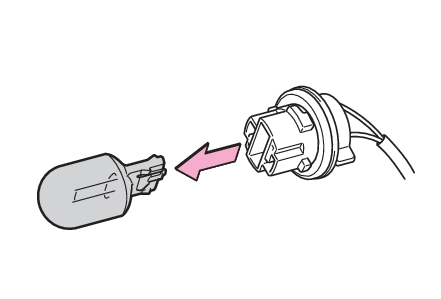
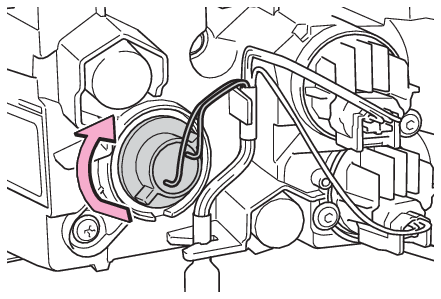
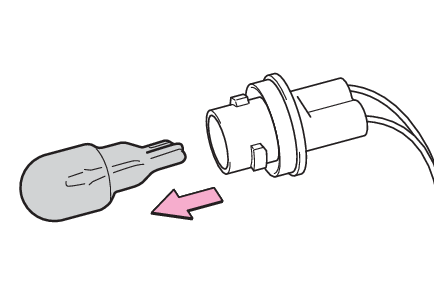
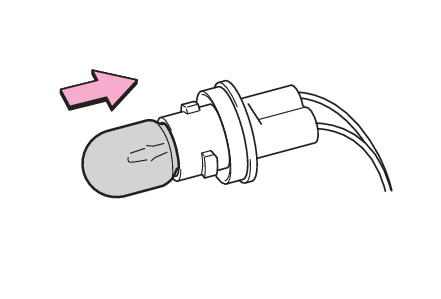
a malfunction. Contact your Toyota dealer for more information in the following situations:Large drops of water have built up on the inside of the lens.Water has built up inside the light.Replacing light bulbFront turn signal lights/parking lights (type A and B)Turn the bulb base counterclockwise.Remove the light bulb.Install a new light bulb then install the bulb base to the light unit by inserting
it and turning the bulb base clockwise.Front side marker lights (type A and B)Turn the bulb base counterclockwise.Remove the light bulb.Install a new light bulb then install the bulb base to the light unit by inserting
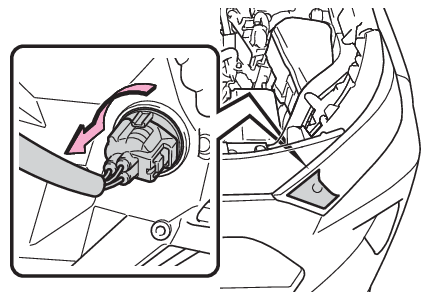
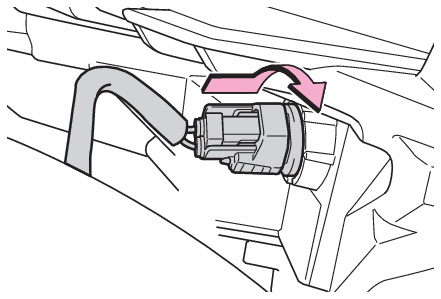
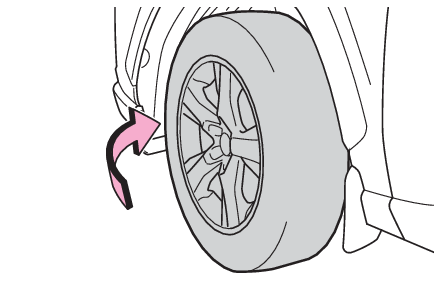
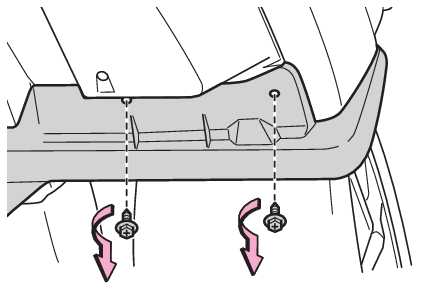
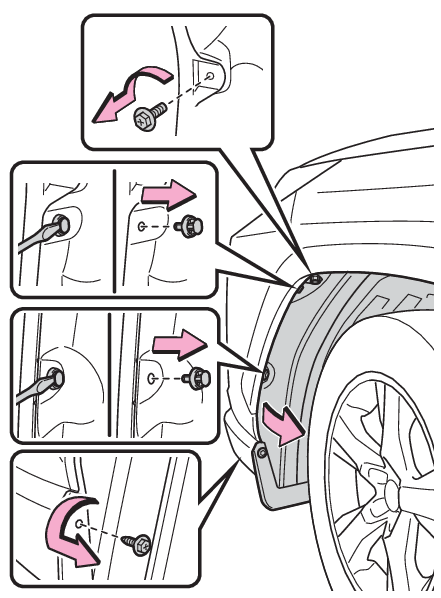
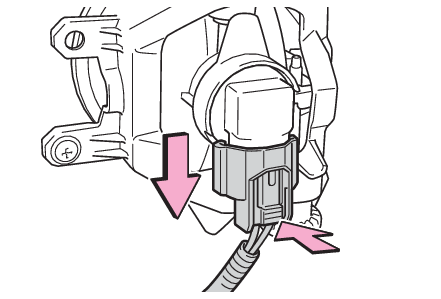
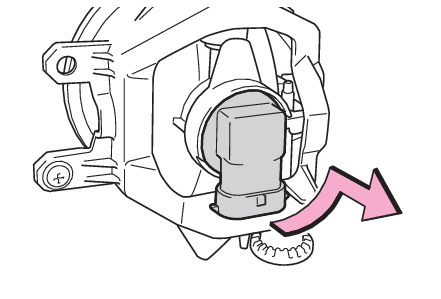
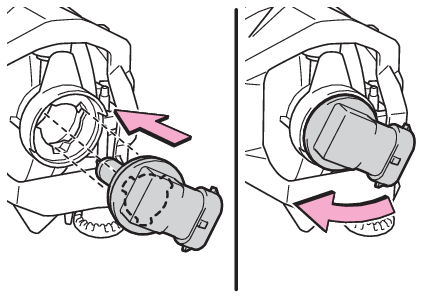
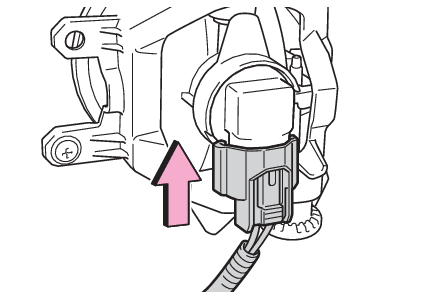
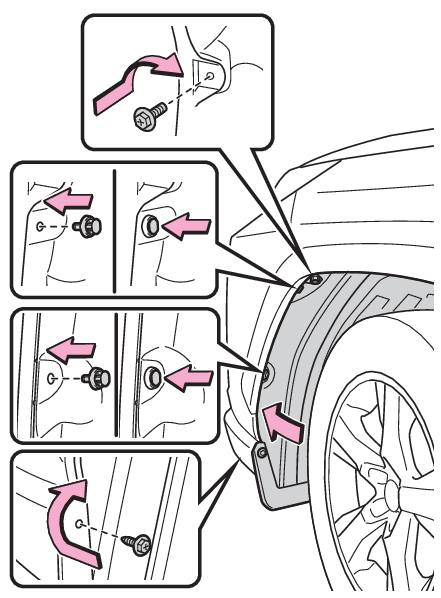
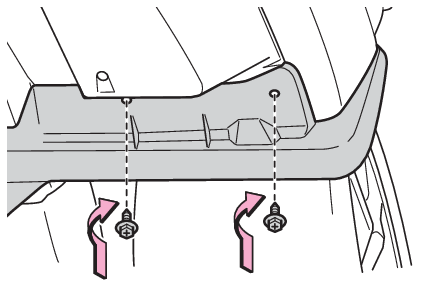
it and turning the bulb base clockwise.Fog lights (if equipped)To allow enough working space, turn the steering wheel.Remove the screws.Remove the screws and clips, partly remove the fender liner.Unplug the connectorTurn the bulb base counterclockwise.Set the new light bulb.Align the 3 tabs on the light bulb with the mounting, and insert. Turn it clockwise
to set.Set the connector.Shake the bulb base gently to check that it is not loose, turn the front fog lights
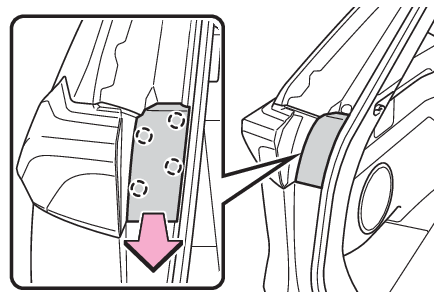
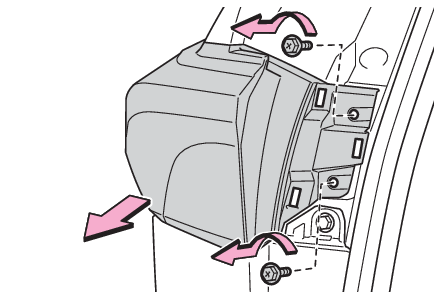
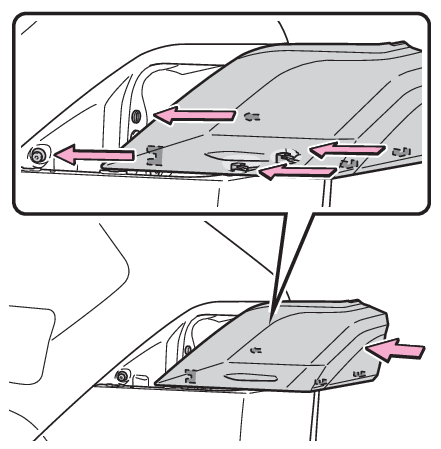
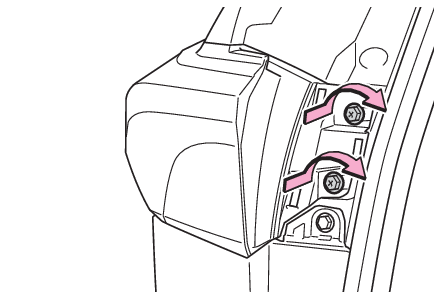
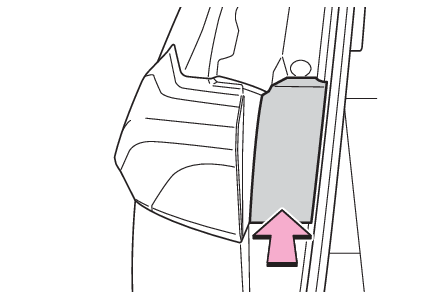
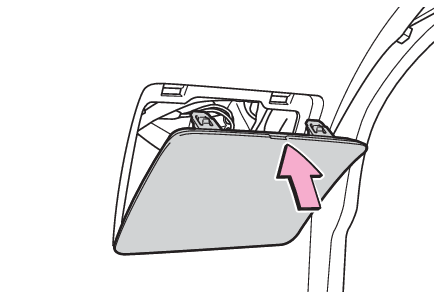
on once and visually confirm that no light is leaking through the mounting.Reinstall the fender liner.Reinstall the screws.Rear turn signal lightsOpen the back door and remove the cover.Remove the securing screws and remove the unit.Remove the lamp assembly by pulling it directly backward from the rear of the vehicle.Turn the bulb base counterclockwise.Remove the light bulb.Install a new light bulb then install the bulb base to the light unit by inserting
it and turning the bulb base clockwise.Align the grooves on the light unit with the claws, and insert the light unit straight
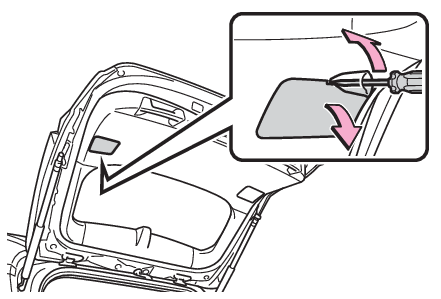
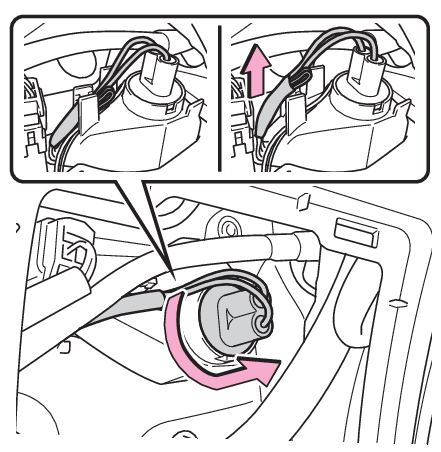
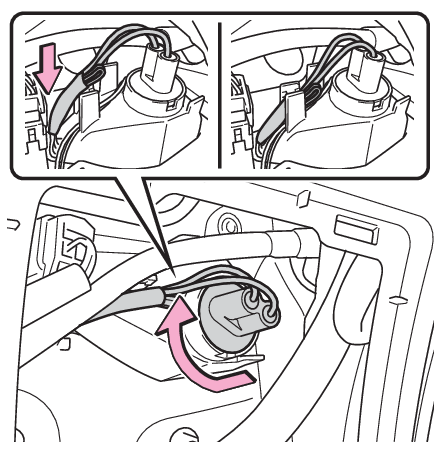
so that the pin on the light unit fit into the hole. Confirm that the light unit is completely secured.Reinstall the screws.Reinstall the cover.Back-up lightsOpen the back door and remove the cover.To prevent damage to the cover, protect the tip of the screwdriver with a rag.Turn the bulb base counterclockwise.Remove the cord from the clip before turning the bulb base.Remove the light bulb.Install a new light bulb.Install the bulb base to the light unit by inserting it and turning the bulb base
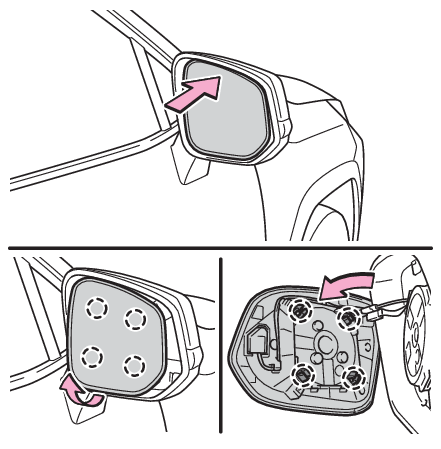
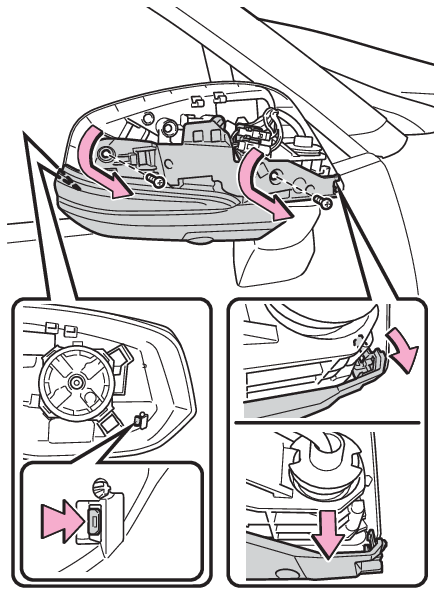
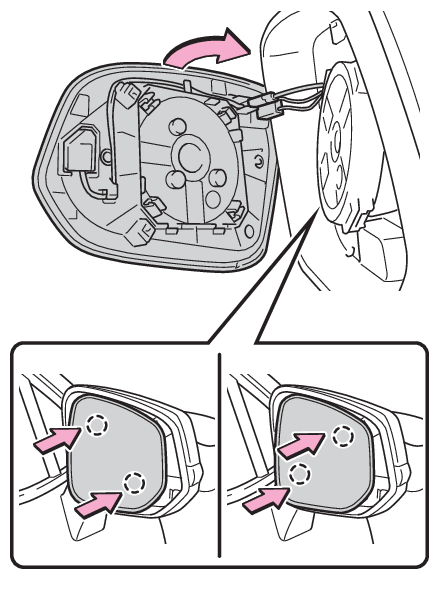
clockwise.Secure the cord with the clip back again after installing the bulb base.Reinstall the cover.Outer foot lights (if equipped)Press the upper part of the outside rear view mirror to tilt the mirror face upward,
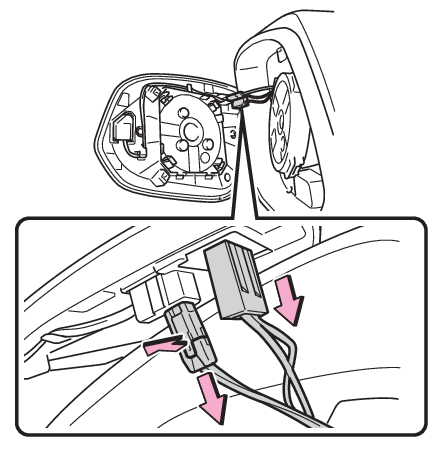
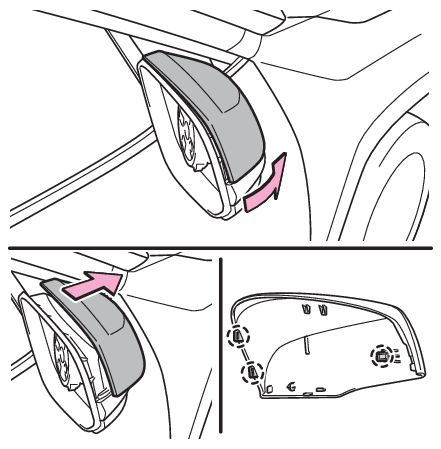
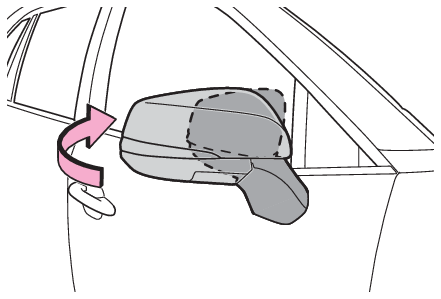
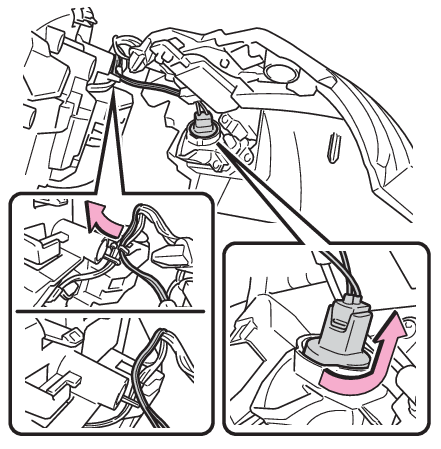
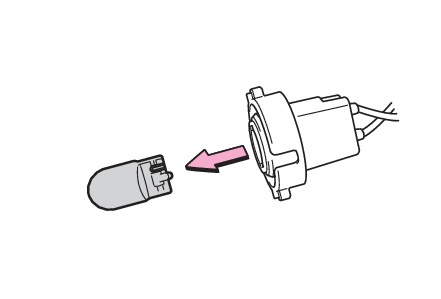
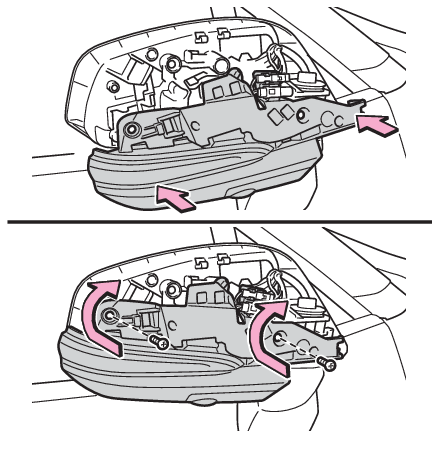
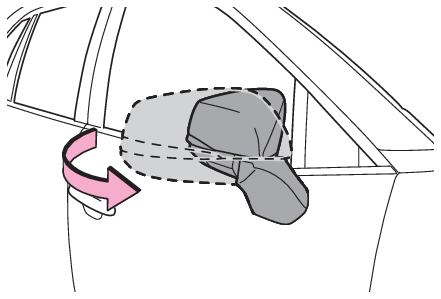
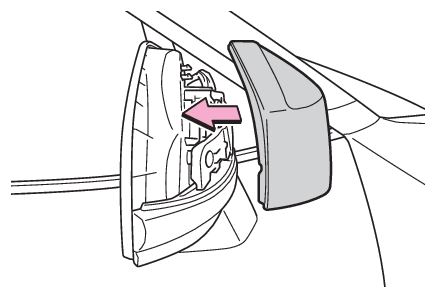
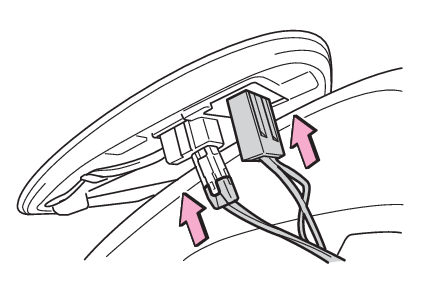
and disconnect the four tabs behind the mirror.Pry the mirror out toward you, and disconnect two tabs at a time.Work carefully, ensuring that you do not drop the mirror.Disconnect the connectors behind the mirror, and remove the mirror.Make sure to check the connectors, to avoid connecting upside down when reinstalling.Work carefully, ensuring that you do not drop the mirror.Disconnect the tabs behind the mirror cover, and remove the mirror cover.Fold the mirror before removing the light unit.Remove the light unit.Remove the two screws, and disengage the two tabs with a flat-head screwdriver.Work carefully, ensuring that you do not damage the tabs.Turn the bulb base counter-clockwise.Remove the cord from the clip before turning the bulb base.Remove the light bulb.Install a new light bulb then install the bulb base to the light unit by inserting
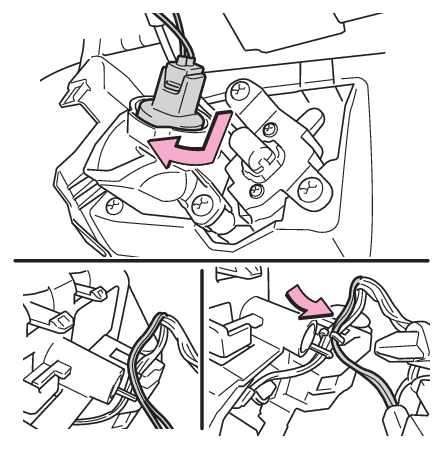
it and turning the bulb base clockwise.Secure the cord with the clip back again after installing the bulb base.Install the light unit.Make sure that the two tabs of the light unit are engaged securely, and install the
two screws.Extend the mirror.Install the mirror cover.Reconnect the connectors of the mirror.Align the tabs, and secure the mirror by pushing in each diagonally-opposite pair
of tabs in order.Make sure to insert the tabs in order as shown in the illustration, and push them
in until a click is heard.If you do not hear the click, do not force the tabs in. Instead, remove the mirror
and check that the tabs are aligned.Warning:Replacing light bulbTurn off the light. Do not attempt to replace the bulb immediately after turning off
the light. The bulb become very hot and may cause burns.Do not touch the glass portion of the light bulb with bare hands. When it is unavoidable
to hold the glass portion, use and hold with a clean dry cloth to avoid getting moisture
and oils on the bulb. Also, if the bulb is scratched or dropped, it may blow out or
crack.Fully install light bulb and any parts used to secure it. Failure to do so may result
in heat damage, fire, or water entering the light unit. This may damage the light
or cause condensation to build up on the lens.Do not attempt to repair or disassemble light bulbs, connectors, electric circuits
or component parts.Doing so may result in death or serious injury due to electric
shock.To prevent damage or fireMake sure bulb is fully seated and locked.Check the wattage of the bulb before installing to prevent heat damage.